
Blender is the ultimate partner for your kitchen. Proper maintenance and regular cleaning increase the durability of any kitchen appliance. So, it’s important to know how to clean the blender motor, base, blades, and jar to get a long time of service.
In general, the cleaning procedure is the same for all blenders. It may differ in the case of very few models. Some are needed to be dissembled part by part. On the other hand, some come with a self-cleaning feature.
Want to know the easiest and quickest way step by step? You just go on…
How to Clean a Blender Motor?
Cleaning a blender sometimes becomes a bit difficult. It will be easier if you know how the procedure and utilize it in the right way.
Every kitchen appliance needs regular cleaning. You must keep the motor neat and clean for consistent performance and durability.
You cannot reach it easily because the motor is placed inside the base. You have to open the outer cover. Don’t open it if your machine is under warranty period. In that case, you have to do it from the outside.
Use a soft brush to keep the way of airflow clean. If the air flows easily inside the base, it will keep the motor cool.
You can use a blower machine to remove the dust inside the base. If you do it regularly, the dust cannot be settled or stick to the motor or other parts.
Do you have enough knowledge of electronic devices? You can open the cover if the answer is affirmative and your machine has no warranty.
Never use water to clean the motor and other electrical parts.
How to Clean Blender Base
The base is the most important part of a blender. All the spare parts and the control panel are assembled here. The motor is placed inside the base. It’s required to be safe from dust and liquids. So you need to keep the base tiptop always.
Step 1
Make sure it’s disconnected from the power source. First, wipe it with a dry and soft cloth. Use a damp cloth or sponge if the base sticks with dust or dry food. Never use a wet cloth or foam because the base contains all the electrical components.
Mix a few drops of liquid soap with warm water. Soak a soft cloth or sponge in that liquid. Then keep twisting it to force out the liquid until it becomes damp. Wipe the base gently with it. Do this repeatedly until you’re done.
In the case of the touchpad/buttons and the screen, follow the same. Wiping the control buttons with a rag may be a bit hard. In that case, use a Q-tip.
Step 2
Wiping with a damp rag or sponge, the base becomes damp. The damp surface of the base or control panel is very dangerous for the user. There is a risk of electric shock.
So, after completing the whole process, ensure the base is air-dried. You can do it simply with a hair drier. If you don’t have any sources of dry air, then keep it in a warm place.
Do it every time to keep you and your item safe from unwanted incidents.
How to Clean the Blending Jar
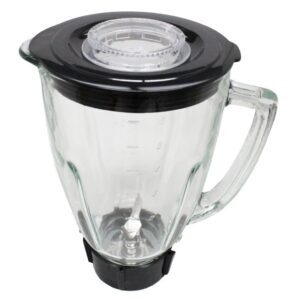
You will probably not find a single user using his blender to make a recipe. After completion of a recipe, you should prepare it for the next use. It’s better to clean it as soon as possible after finishing the blending task. Otherwise, the food will dry and stick to the body.
Some models come with a self-cleaning option. Though the procedure is almost similar, you can clean these models in 30 seconds.
Required Items
- Warm water
- Liquid soap
Cleaning Procedure
- Pour a few drops of liquid soap into the jar.
- Fill half of the jar with warm water.
- Close the lid.
- Plugin the power cord with the power source.
- Run it for a few seconds.
- Finally, wash the jar with fresh water.
If the food still remains inside the jar, then use a cleaning brush. Be very careful about the blades. Don’t put your fingers close to the blades to prevent you from any injuries.
Important Notes
- Don’t remove the warranty seal, if any.
- Never submerge the base or motor in water.
- Don’t use abrasive brushes; they will dull or scratch the surface.
- Clean it immediately after blending.
How to Clean the Blades
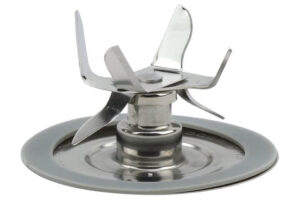
Blades are the crucial parts of a blender and play the main role. You might find various types of blade assembly. Some come with a 6-blades assembly, but 4-blades are the most common.
For consistent performance, you need to keep the blades neat and clean. Moreover, if you want to have the blades as sharp as the sword for a long time, there is no alternative to regular cleaning. Well, let’s know about the procedure in detail.
Blenders with a self-cleaning option
There are so many models with a self-cleaning facility available on the market. These units offer easy cleanup. Cleaning the blades of these units is very easy. Even you can do this within a few seconds.
First, clean the jar by applying the self-cleaning option. Then check if any leftover food elements are stuck between the blades. If any, then use a brush to remove them.
Blenders without a self-cleaning option
Suppose you own a blender that doesn’t have a self-cleaning option; you need to do it manually. Though it doesn’t have an auto-clean opportunity, you don’t need to be worried. You can get a similar result following some simple instructions.
Usually, you need to clean the blades after cleaning the blending jar—usually, not all the time; you need to do it separately. If you find the blades are still dirty, you must clear them.
Some blades are removable, and some aren’t. Use a brush in the case of the non-removable blades.
On the other hand, remove the removable blades carefully. You can make a mixer of dishwasher soap and hot water. This mixer is very handy for cleaning the blades and other parts.
Be very careful while handling the blades to prevent yourself from any fatal injuries.
Final Words
Thousands of models are available within different ranges of price. Your blender may be cheap, medium, or expensive. It completely depends on your blending needs and budget.
The price doesn’t make a big difference when it comes to maintenance. Even the most expensive one needs proper maintenance. Otherwise, it may not reach your expectations.
Hopefully, this article is helpful for you, and by now, you know how to clean a blender and other parts within a short time.